There’s a silly, old Goodwrench commercial featuring Stephen Colbert. He walks around a GM Goodwrench garage interviewing the different fellas that work there in a sly effort to tout the lengths to which the company goes to improve their service. At the end of the commercial, Colbert asks a mechanic, “If Mr. Goodwrench were a tool, what kind of tool would he be?” The mechanic matter-of-factly answers, wrench. (Duh, man.) But Colbert replies, “Oooo, sorry, miter saw is what we were looking for. Miter saw.”
I think we all know that Colbert is a little out of his gourd in that commercial. Mr. Goodwrench would, in fact, be a wrench. That’s true because a wrench is the right tool for many of the jobs a mechanic does. Right tool, right job. That’s the way it works in a garage, and that’s the way it works with strength programming.
The right exercise is the right tool to accomplish the right job – or, in our case, meet the right goal. That all sounds nice. But it raises a big old, greasy question: How do you choose the right exercise tool to accomplish the right training job?
It’s a big question that outwardly seems tough to answer. But we’ve developed a system that simplifies exercise selection so it meets a person where they are at, employs the right tool for the right job, and fastens programming together into solid movement progressions.
In this article series, I’ll break down our system for dialing in exercise selection for folks new to our system in part one, and for advanced folks in part 2. Maybe, just maybe, we’ll discuss endurance in part 3.
It begins with breaking down the main movement patterns.
The Four Shapes: Hinge, Squat, Push, Pull
Coming up in the fitness industry, we learned to call them movement patterns. Our colleague Vernon Griffith calls them shapes. They’re interchangeable, and I like them both, so I used them both here. Regardless of which descriptive term you choose, hinging, squatting, pushing, and pulling are strength training’s fundamental movements. Each person that hopes to successfully build strength and resilience must first build skill with these fundamentals.
Hinging skill comes before deadlifting strength, as squatting skill comes before squatting strength. You must know how to position your arms in relation to your torso to move weight before you can gain appreciable pushing and pulling strength.

Throughout the years, after lots of learning, lots of experimentation, and lots of experience training a lot of friggin people, we developed a progression and regression system that makes it easy for people to learn each of the fundamental movement shapes. And it also makes it easy for us to put people in the best position to be successful with each movement by finding their correct starting point. How’s about a look at each progression?
Hinge: Handcuff Hinge >> Kettlebell/Dumbbell RDL >> Kettlebell Deadlift >> Barbell RDL >> Rack Pull Deadlift >> Hex Bar Deadlift
Squat: Assisted Body Weight Squat >> Body Weight Squat >> Goblet Squat >> Zercher Squat >> Barbell Front Squat/Safety Bar Squat
Push: Modified Push-up >> Push-up >> Dumbbell Bench Press >> Incline Dumbbell Bench Press >> ½ Kneeling Single Arm Landmine Press >> ½ Kneeling Single Arm Kettlebell Press >> Standing Viking Press >> Standing Double Kettlebell Overhead Press
Horizontal Pull: Inverted Row >> Chest Supported Dumbbell Row >> 3-point Dumbbell Row >> Bent Over Dumbbell Row >> Bent Over Barbell Row
Vertical Pull: Inverted Row >> Inverted Row – Level II Chin-up >> Level I Chin-up >> Level II Chin-up >> Level III Chin-up >> Chin-ups/Pull-ups
Each progression begins with the least challenging/least complex variation and, well, progresses to the most difficult or the one which can be most heavily loaded. By starting with the appropriate exercise, and the appropriate amount of loading, folks can ratchet themselves forward toward greater levels of skill, strength, and resilience.
What’s left is to find the starting point that puts someone in the best position to be successful, regardless of their current fitness level and exercise experience.
Where do we start?
The following sections give the good and plenty on our process of dialing in on how we choose the right strength tool for the right strength job for the right person.
They answer the questions:
Can you achieve good lifting positions?
Can you maintain those positions?
Can you express strength while you do both?
We start with mobility.
Mobility First
The first step is getting a good handle on how someone organizes their body to move in a general sense. At this point, we also tease out any movement limitations that might affect skill and performance with any of the fundamental movement shapes. To do this, we use a handful of tests that we’ve stolen and/or adapted from systems over the years to create our own. (We ain’t sneaky, we just smart.) We use what works for our training method and our clients and disregard what doesn’t fit.
We test…
Hip mobility and control with three simple tests:
-
- Active straight leg raise
- Seated toe touch
- Standing toe touch
Shoulder mobility with three simple tests:
-
- Shoulder mobility screen
- Impingement clearing test
- Straight arm raise
Global movement with two more simple tests:
-
- Sit and rise test (Brazilian get-up)
- Resting squat
This short movement test battery gives us, and our new members, a comprehensive look at how well or poorly someone moves. We use what we find to coach members on mobility exercise selection in programs, and we use what we gather here to cross reference with what we find during our strength skill testing to determine the best exercises for the person. It also informs where a person might need extra attention with coaching and cueing.
After we test mobility, we move on to basic, body weight strength skills.
Postural Control
Once we know how well a person moves, we want to know how well they hold still…and control themselves with basic strength training shapes.
We test…
Push-up position plank: Can you hold tall and tight plank for 2:00?
Glute bridge isometric: Can you maintain a straight line from shoulders to knees for 2:00?
Inverted row isometric: Can you maintain a tall and tight row iso, starting from 40 degrees, for 2:00?
With each movement, we have standards that tease out a person’s strength at the most basic level. This is our strength starting point because if a person can’t hold themselves in a good position with only their body weight, they’re not ready for heavily loaded strength exercises. Conversely, if they smoke these tests with a lot of gas in the tank, they likely have requisite strength skill and strength capacity to take on more complex strength exercises.
After we finish the isometric tests, we test…
Body weight reverse lunges: Can you perform 8 reps on each leg, with good posture, and only 1:00 break between sides?
This tells us how a person manages moving on one leg with balance and postural control.
Then it’s time to test baseline loaded strength with our form and fidelity testing.
Form and Fidelity
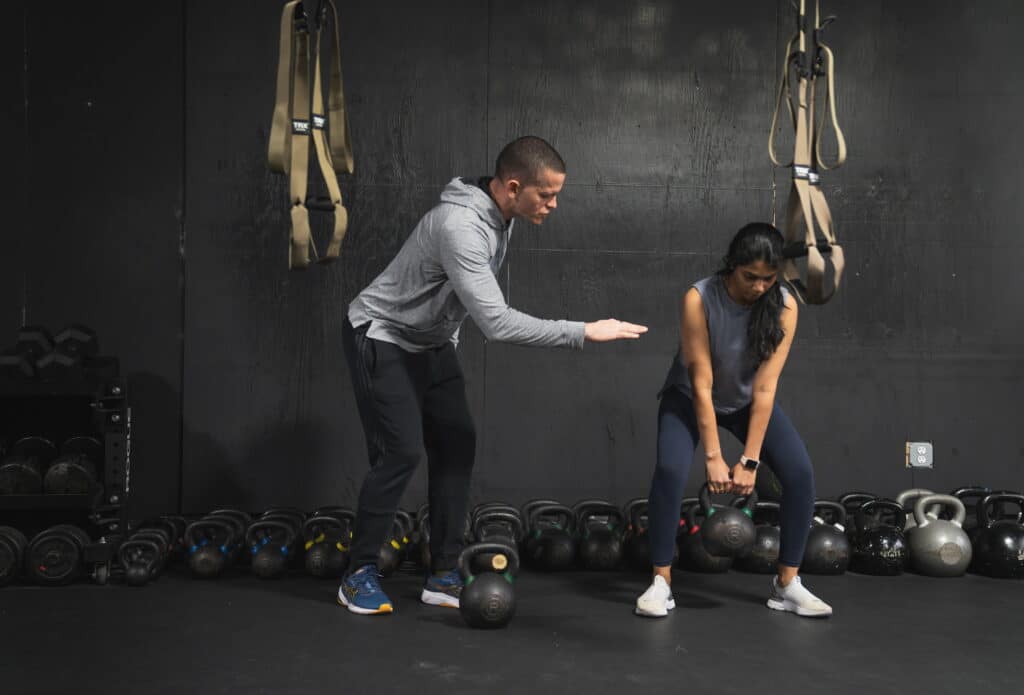
This testing section shows how skilfully a person moves when we add weight to the basic movement shapes — form. It also gives us a solid gander into their strength capacity. That’s the fidelity part of this two-F party. These tests answer the two-part question, can this person get into good lifting positions when weighted, and can they express strength and good form over multiple sets? This is the entrance into our strength training progressions.
We do 2 sets of 8 reps with each exercise with 2 minutes rest between. If a person nails form while handling a weight that works for them with 4-5 reps left in the tank at the end of each set, they have a great start with form and fidelity. If they don’t, we know that we need to start at the most basic, and sometimes modified, end of the progression system. Saying all this made me realize that I should tell you which movements we test. Let’s do that.
We test…
Goblet squat
Kettlebell deadlift
Inverted row
Push-up (modified by elevating the hands on a bar if necessary)
I mentioned above that we’re looking for where a person gets with 4-5 reps left in the tank at the end of each set of 8. However, we do have a strength standard system that denotes when a person is ready to progress to the next level of exercises. This is most important for the lower-body progressions, squatting and deadlifting.
Goblet Squat: When a member can do two good sets of eight goblet squats with a 53lb kettlebell, they’ve passed go and can move on to zercher squats.
Kettlebell Deadlift: When they can kettlebell deadlift 132lbs for two sets of eight solid reps, they progress to barbell RDLs.
Inverted Row: When a person can inverted row with their body at a 30 degree angle from the ground for two good sets of eight, they can start working on the chin-up/pull-up progression.
Push-up: And when a person can do two good sets of eight modified push-ups with the bar set at mid-shin, they can start progressing to push-up volume from the floor.
Using Test Outcomes to Make a Plan
All of the tests combine to give us a clear picture of where a person should start with each movement progression. For our gym members, and our Primed & Powerful members, we select the exercises they should start with on the given program. The mobility tests combined with the postural control and form and fidelity tests answer the questions that allow us to make smart decisions for clients. Can they achieve good positions? Can they maintain those positions? Can they express strength from those positions? We find THEIR sweet spot, and we start training appropriately hard.
In part two, we’ll cover how we make exercise selection decisions as a person advances and how we coach our members to choose exercises for themselves.
You might also like:
- IS YOUR GYM GOAL WORTH IT?
- A HUGE BENEFIT OF DOING CARDIO YOU PROBABLY DON’T KNOW ABOUT
- HOW TO PLAN A HYBRID ATHLETE TRAINING WEEK
- HOW A HYBRID ATHLETE SHOULD PLAN THEIR TRAINING DAY
- 4 REASONS WHY YOUR ENDURANCE PLATEAUED
- HOW TO TRACK YOUR FITNESS PROGRESS
- GAMING YOUR WEARABLES: HOW TO BEAT YOUR FITNESS TRACKERS INSTEAD OF THEM BEATING YOU
- MORPHEUS HEART RATE TRAINING: WHAT IT IS, WHY WE USE IT, AND HOW YOU CAN GET THE MOST OUT OF IT
- THE MOST IMPORTANT FITNESS VARIABLES: CONSISTENCY AND CONTINUITY
- HOW TO SET GOOD GOALS
- LIVE PHYSICALLY IN 2024
- LIVE YOUR EVERDAY ADVENTURE
- WHEN CAN YOU EXPECT REAULTS FROM TRAINING?
- YOU’RE NOT OLD, YOU’RE JUST ACTING LIKE IT
- RELATIVE STRENGTH: WHAT IT IS, WHY WE TEST IT, AND HOW TO BUILD IT
- LIFE BEYOND YOUR GYM GOALS
- EUSTRESS TRAINING: HOW TO LIFT WEIGHTS AND MANAGE STRESS AT THE SAME TIME
- WANT TO MAKE PROGRESS? PUT SOMETHING HARD ON THE CALENDAR
- START NOW: WHY WAITING FOR THE PERFECT TIME IS THE WORST THING TO DO
- HOW (AND WHY) OUR YEAR-LONG TRAINING PLAN WORKS

